
Wall Flashing Types: Complete Commercial Guide for Indiana Property Owners (2026)
- Jun 4
- 32 min read

Wall flashing might not be the most glamorous part of your commercial building, but it's one of the most important. Think of it as your building's first line of defense against water intrusion—strategically placed barriers that redirect moisture away from vulnerable areas before it causes serious damage.
Here's what sets wall flashing apart from its roofing counterpart: while roof flashing protects horizontal transitions, wall flashing specifically guards vertical surfaces where walls meet windows, doors, penetrations, and other building components. These vertical applications face different challenges than roofs. Water doesn't just run straight down walls—it can be driven sideways by wind, pulled into cavities through capillary action, or trapped behind exterior finishes.
Indiana's climate makes proper wall flashing even more critical. You've seen our weather swing from humid summer thunderstorms to freezing winter conditions within the same year. Those freeze-thaw cycles are particularly brutal on commercial buildings. When water penetrates exterior walls and freezes, it expands, creating cracks and deterioration that compounds over time. Add in our prevailing winds during storm systems, and you've got water being forced into every unprotected seam and joint.
The International Building Code (IBC) and International Residential Code (IRC) lay out specific requirements for wall flashing installation, particularly around windows, doors, and other wall penetrations. These aren't suggestions—they're minimum standards designed to prevent the kind of water damage that can compromise structural integrity. For commercial properties, compliance with these codes isn't just about passing inspections; it's about protecting your investment.
Throughout this guide, we'll break down the eight primary wall flashing types you'll encounter in commercial construction: through-wall flashing, head flashing, sill flashing, jamb flashing, parapet flashing, counter flashing, reglet flashing, and kick-out flashing. Each serves a specific purpose in your building's moisture management system.
The connection between proper wall flashing and your overall building envelope can't be overstated. Just as commercial roof framing requires precision and expertise, wall flashing demands careful attention to detail during installation. Cut corners here, and you're looking at costly repairs down the road—water damage, mold growth, structural issues, and decreased property value.
Let's get into the specifics of each flashing type and how they work together to keep your commercial property dry and protected.
Through-Wall Flashing: Foundation of Commercial Masonry Protection
Through-wall flashing sits at the heart of moisture management in commercial masonry buildings. Think of it as the safety net that catches water infiltration before it can damage your building's interior or structural components. This type of flashing spans the entire thickness of a wall assembly, from the interior face to the exterior, creating a continuous water barrier within cavity wall construction.
Here's how it works: water that penetrates the outer wythe of masonry—and trust me, it will—hits the through-wall flashing and gets redirected outward before it can reach interior walls or insulation. It's not about preventing water from entering the outer layer; it's about managing where that water goes next.
Installation That Actually Works
Proper through-wall flashing installation isn't complicated, but it's precise. The flashing must extend continuously from the interior face of the wall, across the cavity space, and project beyond the exterior face by at least a quarter inch. End dams—those upturned edges at termination points—prevent water from simply running off the sides of the flashing. Without them, you've essentially created a water highway into your wall assembly.
The flashing integrates directly with weep holes placed in the exterior masonry's head joints. These holes, typically spaced 24 inches on center, allow collected moisture to escape. You'll usually see them as the open vertical joints in brick veneer just above the flashing line. If water collects on the flashing but can't get out, you're just creating an interior swimming pool within your walls.
Material Choices Matter in Indiana
You've got two primary options for through-wall flashing materials: sheet metal (typically stainless steel or copper) and self-adhered membrane systems. Sheet metal offers exceptional durability and puncture resistance—it'll outlast most other building components. However, it requires skilled fabrication and careful detailing at corners and penetrations.
Self-adhered membranes have gained popularity for good reason. They're flexible, self-sealing around fasteners, and easier to install in complex geometries. Rubberized asphalt or butyl-based membranes perform well in Indiana's climate, maintaining flexibility even during winter months.
Where Through-Wall Flashing Fails
Indiana's freeze-thaw cycles expose weak installations quickly. Ice formation within wall cavities can lift improperly secured flashing or compromise inadequate laps. We see failures most often at:
Lap joints with insufficient overlap (code requires 6-inch minimum laps)
Missing or damaged end dams at terminations
Incompatible material pairings that accelerate corrosion
Blocked weep holes that prevent drainage
Code Requirements You Can't Ignore
Building codes specify through-wall flashing at several locations: above all wall openings (doors, windows), at the foundation line, at shelf angles supporting brick veneer, and at parapets. Laps must be sealed and overlap in the direction of water flow—meaning the upper piece overlaps the lower, like roof shingles.
Regular inspections catch problems before they become expensive disasters. Professional roof inspectors at 3 Kings Roofing and Construction can assess your commercial building's flashing systems during routine maintenance visits, identifying vulnerable areas before Indiana's weather finds them first.
Base Flashing (Base of Wall Flashing): Protecting the Foundation-Wall Transition
Base flashing serves as your building's first defense against water infiltration where the wall meets the foundation—a junction that's constantly under attack from both above and below. Think of it as the seal between two different building systems that expand, contract, and move at different rates throughout Indiana's freeze-thaw cycles.
This type of flashing creates a waterproof transition that catches water traveling down the wall and redirects it away from the foundation. Without it, moisture seeps into the wall assembly, leading to structural damage, mold growth, and deteriorating building materials. You'll find base flashing on virtually every commercial building's exterior walls, though it's often hidden behind exterior finishes.
Installation Techniques That Work
Proper installation starts with a continuous membrane that extends from below the wall cavity up onto the exterior wall surface. The flashing needs to extend far enough to create a positive drainage plane—typically 6 to 12 inches up the wall, depending on your wall assembly and exposure conditions.
The kickout detail matters more than you'd think. Water needs somewhere to go once it hits the base flashing, which means creating a deliberate exit point. Many installers angle the flashing outward or incorporate drip edges that project beyond the foundation wall. This prevents water from running down the foundation and pooling at the base.
Different wall materials require specific base flashing profiles. Brick veneer needs a two-piece system with counterflashing that tucks into the masonry joints. Metal panel systems often use one-piece profiles with integrated drip edges. EIFS and stucco applications need flashing that accommodates the thickness of these finish systems while maintaining the drainage plane. These considerations also apply to other commercial roofing installations, which you can learn more about in our Commercial Rubber Roof Installation Cost Guide.
Retrofit vs. New Construction Approaches
New construction lets you build the base flashing into the wall assembly from the start. Retrofit applications are trickier—you're working around existing materials and often can't see what's happening inside the wall. Surface-applied flashing membranes work well for retrofit projects, though they require careful surface preparation and proper lapping sequences.
Material Selection for Indiana Conditions
Indiana's clay-heavy soils and high water tables demand materials that won't deteriorate when exposed to constant moisture. Modified bitumen, self-adhering membranes, and stainless steel work reliably here. Avoid materials that become brittle in cold weather or lose adhesion in damp conditions.
Common Installation Mistakes
The biggest error? Stopping the base flashing at the exterior sheathing instead of extending it to the outer face of the wall. This creates a hidden pathway for water infiltration. Other problems include inadequate lapping, missing end dams, and failing to integrate base flashing with through-wall flashing above—creating gaps in your building's water management system.
Window and Door Head Flashing: Protecting Critical Openings
Head flashing might be the most underappreciated component in commercial construction—until water starts pouring through a window frame during an Indiana thunderstorm. This horizontal strip of protection sits above windows and doors, creating a simple but effective barrier that redirects water away from openings rather than letting it seep behind the frame.
Think of head flashing as an umbrella for your windows. Without it, water running down the building's exterior finds its way into the gap between the window frame and the wall assembly. You won't see the damage immediately. Instead, it accumulates quietly behind the wall, rotting structural components and breeding mold.
Installation Sequence Matters
Here's where many contractors get it wrong: head flashing isn't an afterthought you slap on at the end. The proper sequence starts with base flashing at the rough opening's bottom, followed by side flashings that lap over the base. Your window or door installs next. Finally, head flashing laps over the side flashings and extends far enough to create a proper drip edge—typically 3-4 inches past the opening's width on each side.
That drip edge is your secret weapon. It projects outward from the wall surface, forcing water to drop away from the building rather than clinging to the façade and finding its way inside. Without it, surface tension pulls water right back toward the opening.
Material Options for Commercial Applications
Self-adhered membranes offer flexibility and superior adhesion. They're particularly useful for complex opening shapes or retrofit situations. The sticky backing bonds directly to the substrate, creating a continuous seal that won't shift during installation.
Metal head flashing—typically aluminum or galvanized steel—provides long-term durability and a defined drip edge. It's standard in traditional masonry construction and works well with through-wall flashing systems. The key is ensuring proper laps and fastening patterns that don't create new leak points.
Indiana's current building codes require head flashing at all exterior openings, with specific requirements for how it integrates with the weather-resistant barrier. The flashing must direct water to the exterior or to the surface of the weather-resistant barrier.
Common Failure Patterns
Most window leaks don't happen at the window itself—they happen at improperly flashed heads. We see three recurring problems: head flashing that's too short and doesn't extend past the jamb flashing, missing drip edges that allow water to track backward, and improper integration where through-wall flashing meets head flashing above the opening. Each creates a direct pathway for water infiltration that'll cost thousands to repair once the interior damage becomes visible.
Window and Door Sill Flashing: Managing Bottom-of-Opening Drainage
Sill flashing sits at the bottom of window and door openings, where it faces one of the trickiest challenges in commercial waterproofing. Unlike other wall flashing types that shed water downward, sill flashing must catch water that's already made it past the opening and redirect it back outside before it reaches your interior walls.
Here's what makes sill flashing different: water follows gravity, and at the bottom of an opening, you're essentially creating a horizontal surface where water wants to pool. Without proper design, that water finds its way through fastener holes, assembly joints, or straight into your framing.
Sloped Design: Your First Line of Defense
Effective sill flashing starts with slope. We're talking about a minimum 7-degree angle (some specs call for 15 degrees) that directs water away from the building. This isn't optional—a flat sill pan will collect water like a birdbath. The slope should extend from the back of the rough opening forward and slightly outward, creating a continuous drainage path.
Back-Dams and End Dams: Critical Details
The back-dam is that upturned edge at the rear of your sill flashing, typically 3-4 inches high. It prevents water from migrating backward into the wall cavity. Without it, wind-driven rain or capillary action will pull moisture straight into your building envelope.
End dams work similarly at the sides of the opening. These vertical barriers extend up the jambs, creating a watertight basin that channels everything forward and out. Think of it as building a miniature gutter system right into your rough opening.
Sill Pan Systems for Commercial Applications
For commercial storefronts and high-traffic installations in places like Carmel's shopping districts, pre-fabricated sill pan systems offer reliability. These come as complete units—often with integrated back-dams and end dams already formed—that eliminate field-fabrication errors.
Material choices matter here. We typically use 40-mil rubberized membrane or thicker for commercial work. Heavy-duty PVC or TPO membranes work well in high-traffic areas where you'll have maintenance crews, landscaping equipment, or frequent service access. Sheet metal pans (stainless steel or copper) provide excellent longevity but require skilled fabrication and proper soldering or welding.
The key is integrating your sill flashing with the water-resistive barrier and jamb flashing before the window goes in. Get this sequence wrong, and you've essentially built a collection system that funnels water straight into your walls.
Parapet Wall Flashing: Complex Multi-Layer Protection Systems
Parapet walls—those short vertical extensions that rise above your roofline—present some of the trickiest flashing challenges in commercial construction. Unlike standard walls, parapets get hit from all sides: rain, wind, snow, and ice attack the top, while water also threatens from below where the roof membrane meets the wall.
That's why parapet flashing isn't a single-piece solution. It's a multi-layer protection system that requires careful coordination between different wall flashing types to work properly.
Understanding the Three-Layer Approach
Effective parapet flashing involves three distinct components working together. Cap flashing covers the top of the wall, protecting the masonry from direct weather exposure. Through-wall flashing sits within the wall assembly itself, directing any infiltrated water back outside. Base flashing connects the roof membrane to the wall, creating a watertight transition at this vulnerable junction.
Each layer has a specific job, and when one fails, the whole system's compromised.
Cap Flashing Installation Methods
You've got two main options for protecting parapet caps: reglet systems or surface-mounted flashing. Reglet systems involve cutting a groove into the masonry, inserting the flashing, and sealing it—creating a cleaner, more integrated appearance. Surface-mounted flashing attaches directly to the wall face with anchors and sealant.
We generally prefer reglet systems for new construction because they provide better long-term performance and fewer visible fastener penetrations. However, surface-mounted counterflashing works well for retrofit situations where cutting into existing masonry isn't practical.
Thermal Movement Challenges
Here's something many property owners don't realize: metal flashing expands and contracts significantly with temperature changes. Indiana's temperature swings—from summer heat in the 90s to bitter winter cold below zero—create substantial movement in your parapet flashing.
That's why proper installation includes expansion joints every 10-12 feet in continuous runs. Without them, you'll see buckling, fastener pull-out, and eventually, material fatigue. The flashing needs room to breathe, or it'll tear itself apart over time. Similar issues affect metal roofing systems, which is why proper metal roof coatings need flexibility to handle this movement.
Indiana-Specific Weather Considerations
Our state's wind and snow loads put extra stress on parapet systems. Wind creates uplift forces that can peel flashing away from walls if attachment isn't adequate. Heavy snow accumulates against parapets, creating ice dams as it melts and refreezes.
For Indiana commercial buildings, we recommend using heavier gauge flashing (minimum 24-gauge for steel, 0.032" for aluminum) on parapets. The International Building Code requires parapets to extend at least 30 inches above the roof surface in high-wind areas, which means your flashing system needs proper engineering.
Common Failure Patterns
Most parapet leaks happen at corners and transitions. Water sneaks behind cap flashing that wasn't properly counterflashed, or it finds gaps where different flashing pieces meet. Another frequent issue: poorly sealed reglet joints that allow water into the wall cavity.
Watch for staining below the cap, spalling masonry, or interior water damage on top floors—these signal parapet flashing failure that won't fix itself.
Reglet Flashing Systems: Integrated Solutions for Masonry Walls
Reglet flashing represents one of the cleanest, most professional approaches to managing water at masonry wall transitions. Think of it as a built-in slot system that's incorporated directly into your building's masonry during construction. The reglet creates a dedicated channel where counterflashing can be inserted later, creating a watertight seal that's both functional and architecturally refined.
Understanding Surface-Mounted vs. Receiver Reglets
You'll encounter two primary reglet configurations in commercial construction. Surface-mounted reglets attach directly to the exterior wall face, offering flexibility when you can't install during initial construction. They're fastened with anchors and sealed with high-performance sealants to prevent water infiltration behind the unit.
Receiver reglets, on the other hand, get embedded into mortar joints during masonry installation. These are the gold standard because they're integral to the wall assembly. The mason sets the reglet into a horizontal mortar joint, typically at roof-to-wall transitions or where parapet walls meet roofing membranes. Once the mortar cures, you've got a permanent, recessed channel ready to receive counterflashing.
Installation Timing Makes the Difference
Proper reglet placement happens at specific points during construction. For receiver reglets, coordination with your masonry crew matters. The reglet needs to sit at the correct height—usually one to two courses above the roof surface—and must be level across the entire wall length. Any dips or variations create pockets where water can accumulate instead of shedding away from the building.
Counterflashing insertion comes after the reglet's installed and ready. The counterflashing slides into the reglet channel, then gets secured with wedges or clips. You'll want at least four inches of overlap with the base flashing below to ensure proper water shedding.
Material Selection and Cost Considerations
Aluminum reglets offer the most economical option while providing adequate performance for most commercial applications. Stainless steel brings enhanced durability and corrosion resistance—worth considering for buildings near salt exposure or industrial environments. Copper reglets cost considerably more but match copper roofing systems and develop that distinctive patina over time.
When analyzing costs, reglet systems typically run 20-30% higher than surface-mounted flashing initially. However, they reduce maintenance headaches down the road. Traditional surface-mounted options require more frequent sealant renewal and inspection, while properly installed reglet systems can last decades with minimal intervention.
Retrofit Applications
Existing buildings aren't out of luck. Surface-mounted reglets work effectively as retrofit solutions when you're updating an aging commercial structure. The key is thorough substrate preparation—removing old sealants, addressing any masonry damage, and ensuring solid attachment points for the new reglet assembly.
Step Flashing for Walls: Protecting Roof-Wall Intersections
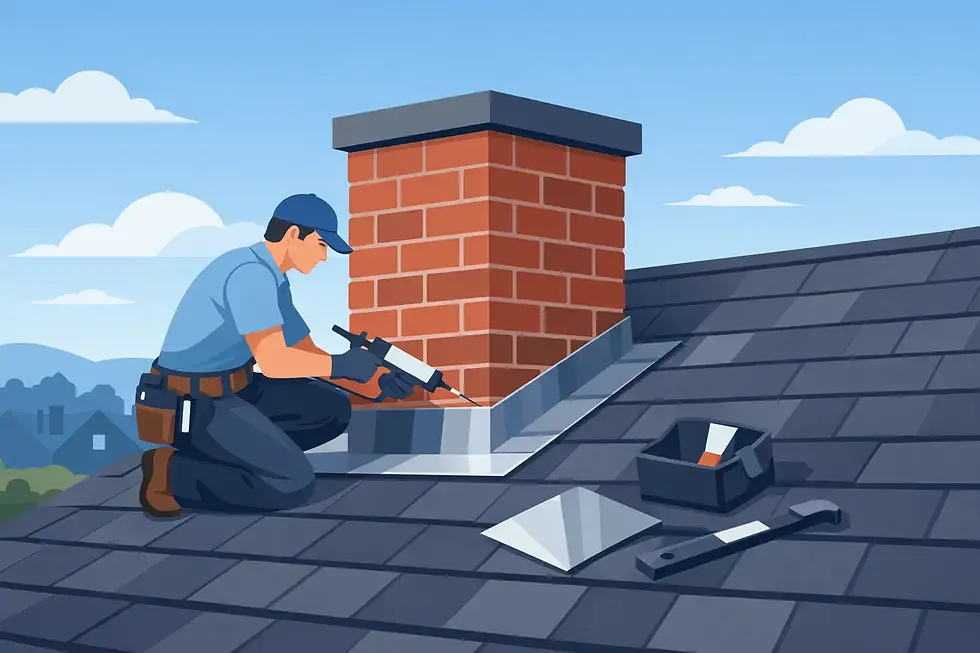
Step flashing ranks among the most misunderstood wall flashing types, yet it's absolutely essential wherever a sloped roof butts against a vertical wall. Think of chimneys, dormers, second-story walls—anywhere your roof line changes elevation and meets a wall, you'll need step flashing.
Here's what makes it different: instead of one continuous piece, step flashing consists of individual L-shaped pieces that interweave with your roofing material. Each piece typically measures 8-10 inches long and gets installed with every shingle course. The vertical leg tucks behind wall cladding while the horizontal leg extends over the roofing material.
The Installation Sequence
Proper step flashing installation follows your roofing progression. You'll lay the first shingle course, then place a step flashing piece so it sits on the shingle, with the vertical leg against the wall. The next shingle course overlaps the horizontal leg of that flashing piece. Then you add another step flashing piece, and so on. This stair-step pattern creates multiple overlapping layers—exactly what you need for Indiana's freeze-thaw cycles and heavy rains.
Each piece should overlap the one below it by at least three inches. For Indiana weather conditions, many contractors push that to four inches, giving extra protection against wind-driven rain and ice dam backup.
Continuous L-Flashing vs. Individual Pieces
Some installers try cutting corners with continuous L-flashing instead of proper step flashing. Don't let them. Continuous flashing can't accommodate building movement or roof flexing—it'll eventually crack or separate. Individual step flashing pieces move independently, which is exactly what you want.
Integrating with Counterflashing
Step flashing only does half the job. You'll need counterflashing installed over it, embedded into wall mortar joints (for masonry) or installed behind siding. This two-layer approach prevents water from running behind the step flashing. The counterflashing should overlap the step flashing by at least four inches, with proper slope directing water onto the roof surface.
Material-Specific Considerations
Wall cladding matters. With brick or stone, counterflashing gets embedded into mortar joints and sealed. With vinyl or fiber cement siding, the counterflashing typically gets installed behind the siding during initial installation or carefully tucked under existing courses during retrofit work.
Step flashing also varies between roofing materials. On shingle roofs, each piece integrates with the shingle layering pattern. Metal roofing requires different detailing—larger pieces with hemmed edges and often soldered seams for standing seam applications.
Common Installation Mistakes
The biggest mistakes? Nailing flashing through the vertical leg (creates leak points), using pieces that are too short (insufficient overlap), and forgetting the counterflashing entirely. We've also seen installers use aluminum step flashing against treated lumber without proper separation—that's asking for corrosion problems within five years.
At 3 Kings Roofing and Construction, we've repaired countless roof-wall intersections where someone tried taking shortcuts. Step flashing isn't complicated, but it demands precision and patience.
Kick-Out Flashing: Critical Protection at Roof Edge-Wall Junctions
Here's something most property owners don't notice until it's too late: that spot where your roof ends and meets a vertical wall. Without proper protection, water flowing off your roof can sneak right behind your siding, causing thousands of dollars in damage you won't see until the rot's already set in.
That's where kick-out flashing comes in.
This specialized flashing type directs water away from the wall and into your gutter system instead of letting it pour down the siding. Think of it as a diverter that channels water at the transition point between your roof edge and an adjacent wall. The L-shaped profile literally "kicks out" water at an angle, preventing it from running down the wall face or infiltrating behind exterior cladding.
Why This Detail Matters More Than You'd Think
Indiana's freeze-thaw cycles make this junction particularly vulnerable. When water gets behind siding and freezes, it expands and creates even bigger openings. Come spring thaw, more water enters. Repeat this cycle for a few seasons, and you're looking at rotted sheathing, damaged framing, and interior water stains.
The proper installation angle typically ranges from 100 to 110 degrees, depending on your roof pitch and siding type. That outward angle ensures water gets ejected clear of the wall before gravity pulls it downward. For commercial buildings with brick or stone facades, the profile needs enough extension to clear the material thickness—usually 2 to 3 inches minimum.
Code Requirements You Can't Ignore
Modern building codes in Indiana now mandate kick-out flashing at these transitions. The 2021 International Building Code specifically addresses this detail, recognizing how critical it is for long-term building performance. Inspectors will look for it, and missing kick-out flashing can hold up your final inspection.
Material selection matters here, too. Galvanized steel works, but it'll eventually rust in our wet climate. Stainless steel or copper last longer, though they cost more upfront. Many commercial properties opt for pre-painted steel that matches their gutter systems for a cohesive look and reliable performance.
Retrofit Solutions for Existing Buildings
Older commercial properties often lack this protection entirely—it simply wasn't standard practice decades ago. Retrofit installation requires careful removal of a few courses of siding, proper integration with existing step flashing, and coordination with the gutter end. It's not always simple, but it's way cheaper than replacing rotted wall assemblies later.
Wall Flashing Materials: Metal vs Membrane Options for Commercial Applications
Choosing the right wall flashing material isn't just about price tags—it's about matching your building's needs with Indiana's demanding climate. Let's break down your options so you can make an informed decision.
Metal Wall Flashing Materials
Aluminum remains the workhorse of commercial flashing. It won't rust, weighs next to nothing, and you'll find it in most building supply yards. Expect 20-30 years of service in typical Indiana conditions. The catch? It's reactive with concrete and some masonry materials, so you'll need proper coatings or separation.
Copper is the premium choice. Yes, it costs three to four times more than aluminum, but you're looking at 50+ years of protection. It develops that distinctive green patina over time, which actually shields the underlying metal. Many architects love it for high-visibility applications where aesthetics matter.
Galvanized steel offers strength at a reasonable price point. It handles foot traffic better than aluminum and works well where you need rigidity. In Indiana's wet-dry cycles, properly coated galvanized steel typically lasts 25-40 years. Just watch those cut edges—they're vulnerable points where rust can start.
Stainless steel combines durability with strength. It's your best bet in coastal-influenced weather or high-pollution areas. The upfront cost runs high, but you're investing in 50+ years of virtually maintenance-free performance.
Membrane Flashing Systems
Self-adhered membranes have transformed how we handle complex wall geometries. These rubberized asphalt sheets stick directly to substrates, conforming to irregular surfaces that would challenge metal flashing. They're perfect for penetrations, window rough openings, and transitions where traditional metal gets fussy. Most quality products maintain flexibility in Indiana's temperature swings from -10°F to 100°F+.
Fluid-applied membranes go where sheets can't. You're essentially painting on your waterproofing layer, which works brilliantly around pipes, conduit, and detailed masonry work. They cure into a seamless rubber-like barrier. The application takes skill—thickness matters, and you can't rush the curing process. But for complex commercial renovations? They're often your only practical option.
Making the Right Material Choice
Your wall type dictates much of this decision. Brick veneer pairs beautifully with traditional metal flashing. Energy-efficient wall assemblies with continuous insulation, similar to what we discuss in steel roof installations, need membrane products that won't create thermal bridges.
Speaking of thermal bridging—metal flashing can conduct heat right through your insulation if you're not careful. In high-performance commercial buildings, you'll want to detail transitions carefully, sometimes combining a membrane backup with minimal metal exposure.
Cost Reality Check
Material costs tell only part of the story. Self-adhered membranes might run $2-4 per square foot installed, while basic aluminum comes in around $3-6 per linear foot. Copper? You're looking at $12-20 per linear foot. But factor in longevity, and those numbers shift.
Compatibility matters more than you'd think. Some cladding manufacturers void warranties if you use the wrong flashing material. Always check specs before committing. Aluminum siding manufacturers often require aluminum flashing. Stone veneer systems typically specify self-adhered membranes at certain transitions.
Review manufacturer specifications closely—they're not suggestions. Most commercial warranties require approved combinations installed by certified contractors. In Indiana's litigious construction environment, that documentation protects everyone involved.
Commercial vs Residential Wall Flashing: Key Differences Indiana Contractors Must Know
The gap between residential and commercial wall flashing isn't just about size—it's an entirely different world of requirements, materials, and expectations. Indiana contractors who assume they can apply the same residential approach to commercial projects quickly find themselves in over their heads.
Building Code Requirements Tell the Real Story
Commercial projects follow the International Building Code (IBC), which sets significantly stricter standards than the International Residential Code (IRC) used for homes. The IBC demands higher wind load resistance, more stringent fire ratings, and detailed documentation at every stage. You can't wing it on commercial jobs. Inspectors want engineered drawings, material specifications, and proof that your flashing system meets specific performance criteria.
Residential flashing? The IRC allows more flexibility. While still regulated, residential installations typically use standardized wall flashing types with straightforward compliance paths. Commercial work demands customization based on building height, occupancy classification, and exposure ratings.
Material Durability Changes Everything
Commercial buildings need wall flashing that'll last 30-50 years minimum. That means heavier gauge metals (minimum 0.019" for copper, 0.024" for stainless steel), UV-resistant membranes, and corrosion-resistant fasteners. You won't see thin aluminum or standard vinyl on commercial projects—the warranty claims would bury you.
The dimensions tell part of the story too. Commercial wall assemblies often require 12-16" flashing widths compared to the 6-8" common in residential work. Taller buildings mean longer vertical runs, which impacts lapping requirements and thermal movement calculations.
Fire Ratings and Multi-Trade Coordination
Here's where commercial work gets complex. Many commercial wall assemblies require fire-rated components, including the flashing system. That means specific UL-listed products and installation methods—you can't substitute materials even if they look identical.
The installation timeline differs dramatically. On residential jobs, one or two installers might complete wall flashing in a couple days. Commercial projects involve coordinating with multiple trades across weeks or months. Your flashing work ties into the masonry contractor's schedule, the window installation timeline, and the commercial roof framing completion dates. Miss your window, and you're holding up everyone.
The Money Question
Commercial-grade wall flashing typically costs 2-3 times more than residential materials alone. Factor in specialized labor, engineering reviews, extended warranties, and detailed documentation requirements, and total project costs can run 4-5 times higher per linear foot.
But those costs protect building owners from catastrophic failures. When you're flashing a 40,000 square foot commercial building in Carmel, there's no room for shortcuts. The stakes—both financially and liability-wise—demand commercial-grade everything.
Wall Flashing Installation Best Practices for Indiana Climate Conditions
Getting wall flashing right isn't just about picking the right materials—it's about installing them properly in a climate that throws everything at you. Indiana's freeze-thaw cycles, summer humidity, and unpredictable spring storms demand installation techniques that account for real-world conditions.
Lap and Overlap Specifications
For continuous water protection, horizontal laps should run a minimum of 3 inches, with 6 inches being ideal in high-exposure areas. Vertical laps need at least 6 inches of overlap to handle water volume during heavy rain. The upper piece always overlaps the lower one—basic, but you'd be surprised how often this gets reversed.
When working with different wall flashing types, maintain consistent lap specifications across transitions. Metal-to-membrane connections need special attention with compatible sealants at every seam.
Fastening Without Compromising Integrity
Strategic fastening keeps flashing secure without creating leak points. Place fasteners in the upper third of vertical sections so water flows below penetration points. Space them 8-12 inches apart horizontally, and always use compatible materials—stainless steel fasteners for copper or coated steel flashing, aluminum for aluminum.
Don't overtighten. You'll dimple the flashing and create water traps. Snug is enough.
Sealant Selection for Indiana Weather
Your sealant needs to handle temperature swings from -10°F to 95°F without failing. Polyurethane-based sealants work well for most applications, while butyl rubber excels for metal-to-masonry connections. Silicone-modified polyether sealants offer excellent UV resistance and flexibility.
Here's what matters: apply sealants to clean, dry surfaces when temperatures are between 40-100°F. That limits your window during Indiana winters.
Seasonal Installation Considerations
Spring and fall offer the most forgiving installation windows. Summer heat makes adhesive flashing tricky—it can become too tacky to work with above 90°F. Winter installations below 35°F compromise adhesive performance and make metal flashing brittle.
If you're installing during shoulder seasons, start early morning on cold days to avoid afternoon condensation issues.
Integration with Building Envelope Components
Wall flashing doesn't work in isolation. It needs to tie seamlessly into your air barrier and vapor retarder systems. The flashing should lap over the water-resistive barrier by at least 3 inches, with proper sequencing so everything sheds water outward.
When integrating with air barriers, maintain continuity by sealing flashing edges with compatible transition membranes. Don't break the envelope's continuous plane.
Quality Control Inspection Points
Check these during installation:
All laps run in proper shedding direction
Sealant forms complete, void-free beads
No wrinkles or fish-mouths in membrane flashing
End dams sit tight against substrates
Fasteners avoid standing water zones
End Dam and Drip Edge Details
End dams prevent water from migrating sideways along horizontal flashing. Fabricate them at least 2 inches high with hemmed edges that seal against vertical surfaces. For metal wall flashing, form drip edges with minimum ¾-inch projections beyond wall faces, angled at 15-20 degrees.
Contractor Coordination
Wall flashing installation requires careful sequencing with other trades. Masons need to know where through-wall flashing terminates. Window installers must understand head flashing integration points. Your siding contractor needs clear communication about starter flashing and drainage planes.
Schedule coordination meetings before work starts—it prevents expensive fixes later.
Wall Flashing for Different Commercial Wall Types: Material-Specific Considerations
Each commercial wall system presents unique flashing challenges. What works beautifully on a brick veneer building can fail catastrophically on an EIFS facade. Understanding these material-specific considerations prevents costly water damage down the road.
Brick Veneer Commercial Buildings
Brick veneer requires continuous through-wall flashing at every shelf angle, which typically occur every two stories. The flashing must extend beyond the brick face to create a proper drip edge. End dams prevent water from migrating laterally within the wall cavity. Most Indiana commercial projects use 40-mil rubberized asphalt or stainless steel flashing here, terminating into either a drainage system or weep holes spaced every 24 inches along the base of each wall section.
The connection between through-wall flashing and weather-resistant barriers remains the weak point in many installations. You need at least 6 inches of overlap, properly sealed with compatible adhesives.
Natural Stone Facade Systems
Stone facades demand even more careful planning than brick. The weight of natural stone creates significant load concerns, meaning flashing must integrate with substantial structural support systems. Stone also varies in porosity—limestone and sandstone absorb water differently than granite or slate.
Flashing for stone typically incorporates drip edges that extend 3/4 inch beyond the stone face, with end dams and back dams to direct water forward and away from the building envelope. The key? Never allow flashing to contact dissimilar metals that could trigger galvanic corrosion.
EIFS Wall Flashing Integration Challenges
EIFS (Exterior Insulation and Finish Systems) creates unique headaches. Since the entire assembly relies on a continuous moisture barrier, any flashing penetration becomes a potential failure point. Modern EIFS installations require special termination beads where flashing intersects the system, along with drainage planes behind the insulation layer.
Window and door heads need robust flashing that ties into the EIFS moisture barrier without creating thermal bridges. That's trickier than it sounds when you're working with foam insulation.
Metal Panel Wall Systems
Standing seam metal panels and composite metal panels handle water differently than mass wall systems. Your flashing must accommodate thermal expansion—metal panels move considerably with temperature changes. Use flexible flashing membranes at transitions, and ensure proper clearance at panel edges.
Z-closures and trim flashings become critical components, directing water away from panel seams and fastening systems.
Precast Concrete Panel Flashing
Precast panels form their own weather barrier, but joints between panels need careful attention. Flashing integrates with joint sealants and backer rods, creating a two-stage drainage system. The outer seal stops most water, while flashing behind catches anything that penetrates.
Panel connections often incorporate reglets—grooves cast into the concrete that receive flashing inserts during installation.
Curtain Wall Systems
Glass curtain walls rely on pressure-equalization principles. Flashing here works with internal gutters and weep systems to manage condensation and any water that bypasses the primary seal. It's less about traditional flashing and more about comprehensive water management engineering.
Wood-Framed Commercial Walls
Light commercial and retail structures with wood framing need all the standard residential flashing details—but sized up. Water-resistive barriers, kickout flashings, and proper drainage planes remain essential. The stakes are just higher with commercial property values.
Mixed-Material Assemblies
Modern commercial design often mixes materials—brick transitions to metal, stone meets glass. These transitions require custom flashing solutions that address different expansion rates, mounting systems, and drainage patterns. Each material junction needs its own detailed flashing strategy, carefully coordinated during design to prevent the "it looked good on paper" syndrome.
Identifying Wall Flashing Failure: Signs Commercial Property Owners Should Never Ignore
Your wall flashing types don't announce their failures with flashing lights or alarm bells. Instead, they whisper warnings through subtle signs that too many property owners miss until thousands of dollars in repairs become necessary.
Let's start with what you can see from the parking lot. Water stains below window joints tell you something's wrong upstream. Dark streaking on exterior walls, especially after rain, means water's finding paths it shouldn't. Look for efflorescence—those white, chalky deposits on brick or block walls. That's salt being pushed out as moisture moves through your building envelope. If you're seeing it, your flashing's already failing.
Paint bubbling near flashing locations? That's moisture trapped behind the surface. Rust stains bleeding through masonry mean metal flashing's corroding inside the wall assembly. You might spot gaps opening between different materials, particularly where metal meets brick or where wall sections join at expansion joints.
Indiana's climate creates predictable failure patterns. Spring thaw exposes winter damage as freeze-thaw cycles compromise flashing seals. You'll often discover problems in March and April when meltwater overwhelms previously adequate defenses. Summer's intense thunderstorms test step flashing and through-wall details. Watch for issues during those periods when consecutive days of rain saturate wall assemblies beyond their capacity.
Inside your building, the evidence can't hide. Ceiling tiles stain in predictable patterns below failed head flashing. Wall discoloration, particularly at corners and where walls meet rooflines, signals trouble above. Mold growth—especially that musty smell in enclosed spaces—means moisture's been present long enough to establish colonies.
Here's something most property owners don't realize: different wall flashing types fail in characteristic ways. Sheet metal flashing develops pinholes at fastener locations first. Adhered membrane flashings peel at terminations. Through-wall flashings clog with mortar droppings during construction, never functioning properly from day one.
Can you tell flashing failure from other moisture problems? Condensation appears uniformly across cold surfaces. Plumbing leaks create localized damage. Flashing failures? They follow building joints, window perimeters, and architectural transitions.
Modern detection goes beyond visual inspection. Infrared thermography reveals temperature differences where moisture changes thermal properties. Professional Roof Inspectors at 3 Kings Roofing and Construction use thermal cameras to map hidden problems you can't see otherwise. Moisture meters quantify dampness in wall assemblies, turning suspicion into measurable data.
Ignore these signs? You're looking at deteriorated sheathing, compromised structural framing, and mold remediation projects that dwarf flashing repair costs. Water doesn't stop at surface damage—it migrates to wherever gravity and capillary action take it, often ruining insulation, electrical components, and interior finishes along the way.
The question isn't whether failing flashing will cause expensive damage. It's whether you'll catch it before that damage becomes structural.
Wall Flashing Repair vs Replacement: Making the Right Decision for Your Commercial Property
You've spotted issues with your wall flashing. Now comes the big question: can you get by with repairs, or do you need full replacement?
Here's the reality—it depends on what's actually going on with your flashing system.
When Repairs Make Sense
Minor issues like deteriorated sealant joints, loose fasteners, or small punctures don't automatically mean you're looking at complete replacement. If the base flashing material is still in good shape and your system is less than 15 years old, targeted repairs often make financial sense.
Common repair techniques include reapplying proper sealants at lap joints, replacing corroded fasteners with upgraded options, and installing metal patches over small tears or punctures. You might also add counterflashing where it's missing or reinforce areas where water entry has started but hasn't caused major damage yet.
These repairs typically run a fraction of replacement costs—we're talking hundreds rather than thousands of dollars for localized fixes.
When Replacement Is the Better Call
Full replacement becomes necessary when flashing has widespread corrosion, metal fatigue throughout the system, or when water's already penetrated behind the material causing wall deterioration. If your building's flashing dates back 25-plus years, you're often throwing good money after bad with repairs.
Code compliance complicates matters too. When you modify more than 50% of a flashing system, many jurisdictions require bringing everything up to current standards. That can turn what seemed like a simple repair into a compliance nightmare.
The Partial Replacement Strategy
There's a middle ground: partial replacement. If you've got localized failures—say at one corner of your building or around specific penetrations—replacing just those sections can extend your overall system's life by another decade.
This approach works best when different wall flashing types on your property have aged at different rates, or when building additions created newer sections alongside original construction.
Making the Financial Decision
Compare projected repair costs against replacement value. If repairs exceed 40% of what full replacement would cost, replacement usually wins. Factor in the warranty too—repairs rarely come with meaningful coverage, while replacement brings 10-20 year warranties on materials and installation.
Consider disruption as well. Replacement projects temporarily limit building access and may require interior protection. Similar to what roof restoration companies face with major projects, planning around your business operations matters.
Get a thorough inspection before deciding. The answer isn't always obvious from ground level, and making the wrong call can cost significantly more down the road.
Wall Flashing Costs for Commercial Buildings in Indiana (2026)
Let's talk numbers. Wall flashing projects for commercial buildings in Indiana typically range from $15 to $45 per linear foot installed, though complex installations can push higher. That's quite a spread, and understanding what drives these costs helps you budget accurately.
Material costs usually represent 30-40% of your total project expense. Aluminum flashing runs $3-$8 per linear foot for materials alone, while copper can hit $15-$25 per foot. Stainless steel falls somewhere in between at $10-$18 per foot. Membrane flashing materials like peel-and-stick products cost $2-$6 per foot but often require additional sealants and primers.
Labor dominates the remaining 60-70% of costs, and here's where things get interesting. A straightforward installation on a single-story building with easy access? You're looking at the lower end. But multi-story buildings requiring scaffolding or lift equipment? That changes everything.
Building height significantly impacts your bottom line. Second-story work adds 20-35% to labor costs. Third story or higher? Tack on another 40-60%. Access challenges—like tight urban sites or buildings surrounded by landscaping—can push costs up another 15-25%.
The wall type matters more than most property owners realize. Installing flashing on metal panels runs $18-$28 per foot, while brick or stone masonry work costs $25-$40 per foot due to the detailed cutting and fitting required. Concrete walls fall in the middle at $20-$32 per foot.
Retrofit projects almost always cost more than new construction integration. You're dealing with removal of existing materials, potential structural surprises, and the challenge of matching new flashing to established building lines. Expect retrofit costs to run 35-50% higher than new installation.
Hidden costs catch many building owners off guard. Scaffolding rental for a mid-sized commercial building runs $2,000-$8,000 depending on duration and complexity. Building disruption—particularly if you're coordinating around occupied spaces—adds project management time and potential revenue loss. Multi-trade coordination when flashing work intersects with masonry, HVAC, or other systems adds 10-15% to overall project timelines and costs.
Now for the good news: quality wall flashing delivers genuine ROI. A properly installed system prevents water infiltration that would otherwise cause thousands in structural damage, mold remediation, and interior repairs. Similar to considerations in our Commercial Rubber Roof Installation Cost Guide, spending wisely upfront saves dramatically over time.
Most commercial property owners see payback within 3-5 years through reduced maintenance calls, lower insurance claims, and preserved building value. Indiana's freeze-thaw cycles make this investment particularly worthwhile—water damage doesn't give you a break just because you're trying to save money.
Building Code Requirements for Wall Flashing in Indiana Commercial Construction
Understanding building code requirements for wall flashing types isn't optional—it's the foundation of legal, lasting commercial construction in Indiana. The International Building Code (IBC) 2021, which Indiana has adopted with specific amendments, sets baseline standards that affect every commercial project across the state.
The IBC requires flashing at specific locations on every commercial building. You'll need it above all exterior openings, including doors and windows, extending at least two inches beyond the opening on each side. Through-wall flashing must appear at every floor line intersection with exterior walls, and base-of-wall flashing is mandatory where walls meet foundations or grade level. These aren't suggestions—they're code mandates that inspectors actively check.
Indiana's state amendments add another layer. The Indiana Building Code (675 IAC 13) includes moisture protection provisions that specify performance criteria for all wall flashing types. Materials must meet ASTM standards for their category: sheet metal flashing needs ASTM A653 compliance, while self-adhering membranes require ASTM D1970 or D1227 certification. Your local building department in cities like Indianapolis, Carmel, or Fishers may enforce additional requirements based on regional weather patterns and historical water intrusion issues.
Integration with water-resistive barriers (WRBs) presents a common compliance challenge. Code requires proper lapping sequences where flashing overlays the WRB below and gets overlaid by WRB above—creating a shingled effect that directs water outward. Missing this detail fails inspection every time.
Parapet walls demand special attention in Indiana's code framework. You'll need through-wall flashing at the base of parapets, counterflashing for coping caps, and proper termination details that meet both IBC Chapter 14 and Chapter 15 requirements. These systems must handle freeze-thaw cycles, something Indiana's climate delivers regularly.
Documentation matters as much as installation. Commercial projects require flashing details on architectural drawings, manufacturer specifications in submittal packages, and photo documentation during installation for as-built records. Third-party inspections through the building department occur at critical phases, typically before concealment of flashing systems.
The consequences of non-compliance extend beyond failed inspections. Property owners face stop-work orders, expensive remediation costs, and potential liability for water damage claims. Contractors risk license sanctions and legal exposure that can threaten their business viability. In Indiana's litigious construction environment, proper flashing installation per code isn't just smart—it's essential protection for everyone involved.
Maintaining Wall Flashing: Preventive Care for Commercial Buildings
Regular maintenance keeps your commercial flashing systems functioning properly and extends their lifespan considerably. For Indiana commercial properties, schedule comprehensive flashing inspections twice annually—once in spring after freeze-thaw cycles and again in fall before winter weather arrives.
During routine inspections, look for separation between flashing and adjacent materials, cracks or splits in the metal, deteriorated sealant joints, and rust or corrosion. Check that counterflashing remains secure and properly overlaps base flashing. Water stains on interior walls or ceilings often indicate flashing problems before external damage becomes obvious.
Essential Preventive Tasks
Sealant renewal ranks as your most important maintenance activity. Most commercial sealants last 5-10 years depending on exposure and weather conditions. Replace sealant when it becomes brittle, shrinks, or pulls away from surfaces. Don't wait until leaks develop.
Clear debris from flashing areas quarterly, especially after storms. Leaves, branches, and dirt trap moisture against metal, accelerating corrosion. Check that weep holes remain open and drains function properly. Inspect fasteners for looseness or corrosion—tighten or replace as needed before wind events compromise the system.
Indiana's seasonal extremes demand specific attention. Spring inspections should focus on ice damage and expansion joint integrity. Summer maintenance addresses UV degradation of sealants. Fall preparation verifies proper drainage paths before snow accumulation, while winter checks monitor ice dam formation around flashing transitions.
Documentation and Professional Support
Maintain detailed records of inspections, repairs, and material specifications for each wall flashing type in your building. This documentation proves invaluable for warranty claims, insurance matters, and planning future work. Photograph flashing conditions annually to track deterioration patterns.
Integrate flashing inspections into comprehensive building envelope assessments. Your flashing doesn't work in isolation—it's part of an interconnected weatherproofing system. Consider scheduling a roof tune-up service that includes flashing evaluation along with other roof components.
Call professional contractors when you spot active leaks, extensive corrosion, loose sections, or damage you can't identify. The cost-effectiveness here is straightforward: a $500 preventive repair beats a $15,000 emergency replacement every time. Factor in water damage to building interiors, and the savings multiply quickly. Smart maintenance protects your investment.
Why Choose 3 Kings Roofing and Construction for Commercial Wall Flashing in Indianapolis
Choosing the right contractor for your commercial wall flashing isn't just about finding someone who understands the technical differences between through-wall flashing and drip edge installations. It's about partnering with a team that brings military-grade precision to every project.
As a veteran-owned business, we approach commercial wall flashing with the same discipline and attention to detail that kept us mission-ready. That means showing up on time, completing work exactly as promised, and treating your property like it's our own. These aren't just talking points—they're values we live by every single day.
Our team knows Indiana's climate challenges inside and out. We've installed wall flashing systems that withstand everything from spring downpours to winter freeze-thaw cycles across the Indianapolis metro area. Whether you're managing a retail complex in Fishers or an office building in Carmel, we've handled the unique demands that come with protecting commercial properties in our region.
What sets us apart? Our lifetime workmanship warranty covers every wall flashing installation we complete. We stand behind our work because we do it right the first time. You'll also work with an Owens Corning certified contractor, which means you're getting industry-leading materials paired with installation expertise that meets the highest standards.
We understand that downtime costs money. That's why we schedule projects efficiently to keep your business running smoothly. No surprises, no unnecessary disruptions—just professional service that respects your operations.
You'll appreciate our straightforward pricing approach, too. We provide detailed estimates that break down exactly what you're paying for, from materials to labor. No hidden fees or last-minute additions that inflate your invoice.
From Noblesville to Zionsville and throughout the Indianapolis metro, we've earned our reputation by delivering quality commercial roofing solutions that protect properties for decades.
Ready to ensure your commercial property has the protection it deserves? Schedule your free wall flashing assessment today. Call 3 Kings Roofing and Construction or visit 3kingsroofingandgutters.com to connect with our team. Let's discuss how the right wall flashing types can safeguard your investment for years to come.
Frequently Asked Questions About Wall Flashing Types
What is the difference between wall flashing and roof flashing?
Wall flashing protects vertical transitions and penetrations in walls—like where walls meet roofs, around windows, or at material changes. Roof flashing handles horizontal plane transitions, such as around chimneys, skylights, and roof valleys. They work together but serve different purposes in your building's water management system.
What type of wall flashing is best for commercial brick buildings?
Through-wall flashing with stainless steel or copper materials works best for commercial brick construction. These wall flashing types handle the unique challenges of masonry, directing moisture through weep holes before it reaches the building interior. Sheet metal flashing outlasts membrane options in high-traffic commercial settings.
How long does wall flashing last on commercial buildings?
Copper and stainless steel flashing can last 50+ years with proper installation. Aluminum typically provides 30-40 years of service, while membrane flashing lasts 20-30 years depending on exposure. Indiana's freeze-thaw cycles affect lifespan, so installation quality matters as much as material choice.
Can wall flashing be added to an existing commercial building?
Yes, though it's more involved than new construction. Retrofitting requires cutting into existing walls or removing sections of siding or masonry. We've successfully added flashing to older Indiana buildings during renovations or after discovering moisture problems.
What causes wall flashing to fail in Indiana commercial properties?
Ice damming, improper installation, and missing lap joints top the list. Indiana's temperature swings create expansion and contraction that stresses poorly installed flashing. Corrosion from dissimilar metals, punctures during construction, and deteriorated sealants also cause failures we see regularly.
How much does wall flashing replacement cost for commercial buildings?
Costs range from $15-45 per linear foot depending on the wall flashing types selected, accessibility, and building height. Complex installations requiring masonry removal run higher. Contact 3 Kings Roofing and Construction for an accurate assessment of your specific situation.
Is wall flashing required by building code in Indiana?
Yes, Indiana's building codes require flashing at all wall penetrations, material transitions, and roof-wall intersections. Specific requirements vary by building type and location, but proper flashing isn't optional—it's legally mandated for good reason.
What is through-wall flashing and where is it required?
Through-wall flashing extends completely through masonry walls, directing water outward through weep holes. It's required at window and door heads, foundation lines, shelf angles, and anywhere water could collect within cavity walls. This is non-negotiable in commercial brick construction.
How often should commercial wall flashing be inspected?
Annual inspections catch problems early. Schedule additional checks after severe storms or when you notice interior water stains. Regular maintenance extends flashing life and prevents expensive interior damage.
Can I see wall flashing problems from inside the building?
Sometimes. Water stains, peeling paint, or mold near windows, doors, or exterior walls signal flashing issues. However, many problems remain hidden until serious damage occurs—another reason exterior inspections matter.


Comments